In this article, I will be assembling the body of the pine guitar. The door frame jambs are too narrow for the width of the sides, so I'll be constructing each side from two halves. Next, I'll need to assemble the guitar's frame by gluing the sides, blocks and linings together. I'll reinforce the frame with additional vertical braces. Then, all that will be left is to glue the back and the soundboard to the guitar frame, and we'll have the guitar body. Watch the video version #3 and #4 of this stage with English subtitles.
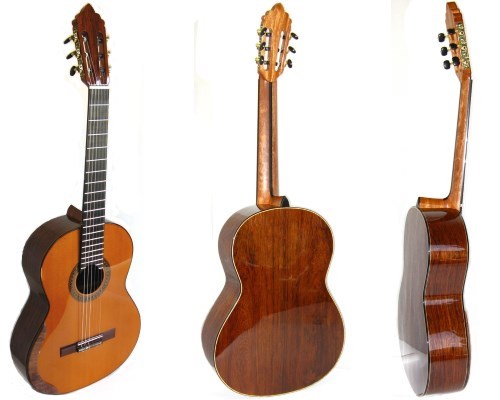
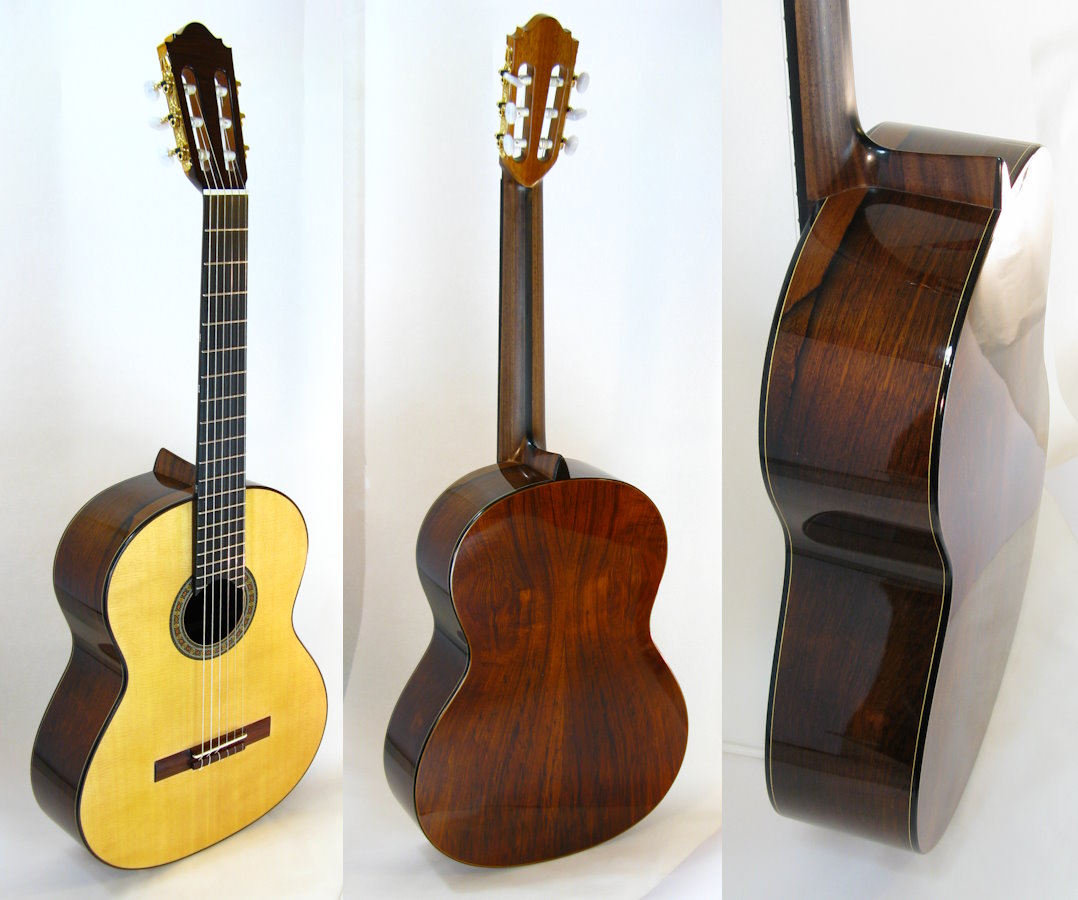
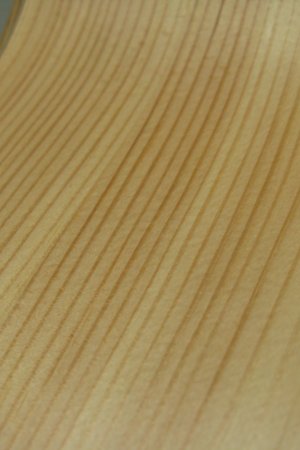
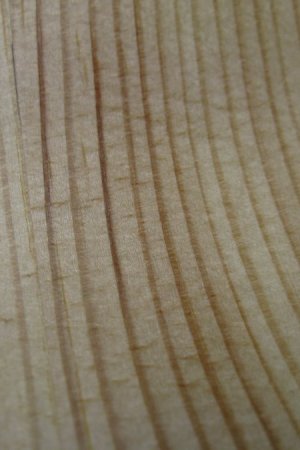
The soundboard and back of the pine guitar are already prepared. Next in line are the sides of the guitar, which are typically made with dense material, even extra-dense material like rosewood. However, I'm breaking this guitar-making convention, and the pine guitar will be genuinely pinenish, perhaps even excessively so.
Why not oak?
Undoubtedly, some might ask why I didn't make the body out of oak, considering it's a dense material. Indeed, all those stories about oak being too crackable and having many pores are for those who forget that guitars are made of rosewood, with the fretboard made of ebony. These are all crackable wood species. It's possible to make a classical guitar from oak and ash.
me: Let me answer why I didn't make the guitar from oak. Firstly, I haven't seen many guitars made of oak. I can't seem to recall any.
you: Really, there are plenty of pine guitars instead!
me: Fair point, agreed :) Secondly, I saw one classical guitar made from ash; it wasn't impressive.
you: Occasionally, even a rosewood guitar might not turn out well.
me: Thirdly, guitar wood kits of oak are not available in tonewood stores, there's no demand. People know something.
you: Craftsmen overlooked oak.
me: Fourthly, The oak texture looks boring and they won’t give you money for it.
you: But oak can be stained. Indian rosewood is just layers of wood, albeit with a pleasant color.
me: Alright, I didn't make the guitar body from oak, opportunities missed.
me aside: Ultimately, I lacked door trim for an oak body, so it will be an ultra-lightweight pine guitar. I'm gonna have to show it to flamenco guitarists!
Bending the Guitar Sides
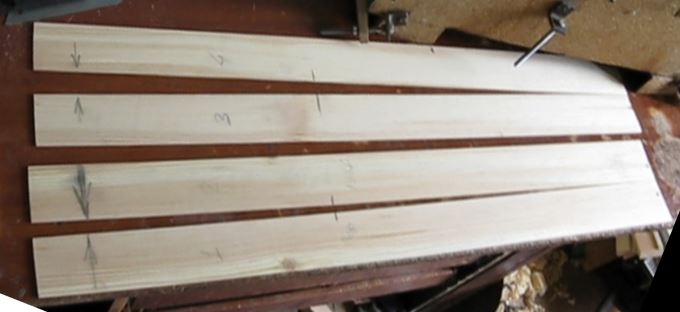
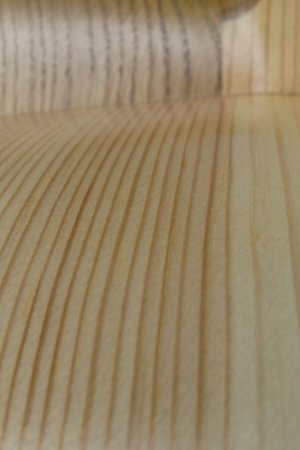
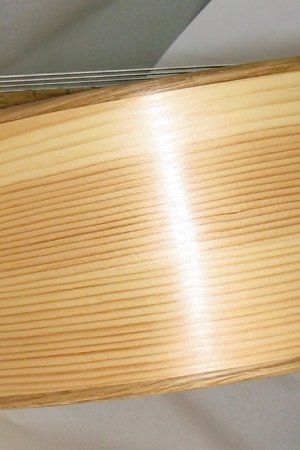
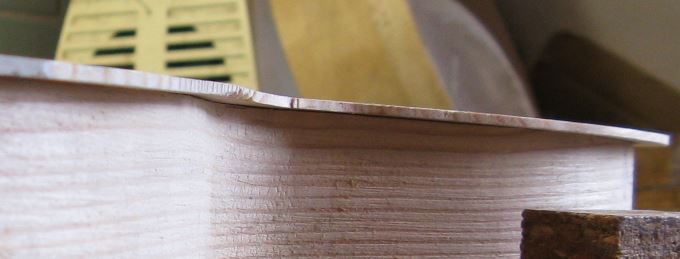
So, after cutting out the blanks for the sides from the door frame, they need to be carefully processed to a thickness of 3 mm. This is the target dimension, meaning the surface should be smooth. Trim the edges along the wood grain, removing any excess width; there's no need to exceed 105 mm. Try to arrange the parts in a way that ensures maximum symmetry, allowing the glue seam to run along the wood layers.
Before bending, I fit the halves of the sides for gluing on my machine from the first article, where I prepare the parts for the soundboard and back. I mark the sides to avoid confusion during the bending process. Usually, I have a nick in a specific place on the end and make a mark indicating the waist of the guitar.
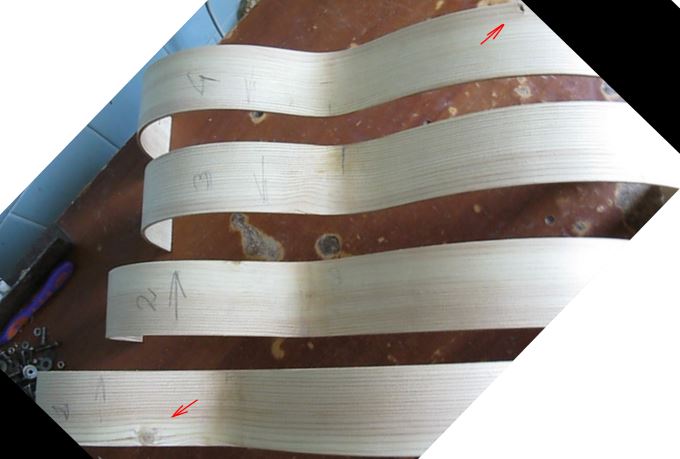
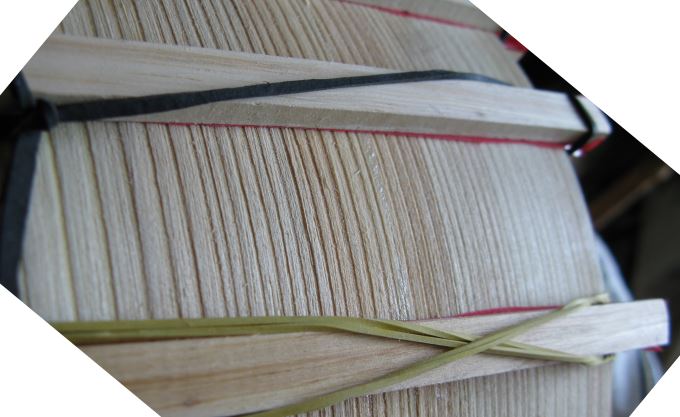
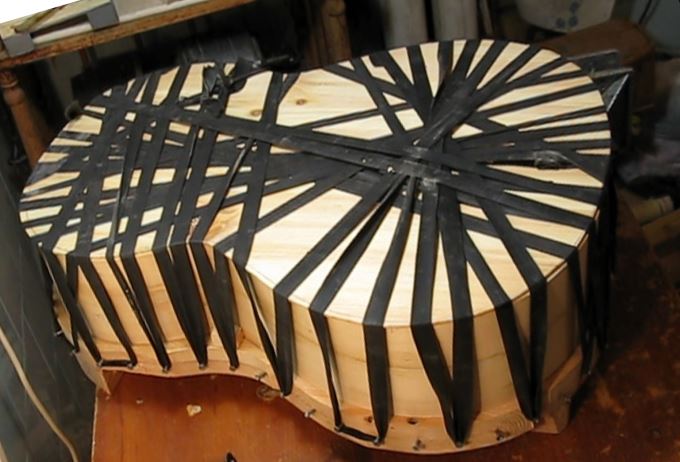
I soaked the wood for literally one hour in cold water. Pine bends very easily. The red arrows indicate defects that have deliberately been pushed to the edges and will be trimmed. (There's a bending stage in the video, see below).
I explained how I glued the sides together in the video. There are English subtitles available. It was my first time performing this operation, and it was interesting for me as well.
In the photo below, you can see that I'm using guide sticks and a rubber band that simultaneously compresses the sticks and pulls the halves of the side together. Everything is turning out very well.
Using this technique is possible for gluing sides made of dense wood. I don't create a reinforcement strip on the inner side of pine, but I do add reinforcing braces. For dense wood, you can create a seam reinforcement similar to what's done on the back. On the outer side, you can do something like an inlay along the seam. How to create a groove for it? Perhaps before bending. This is an issue for some other project.
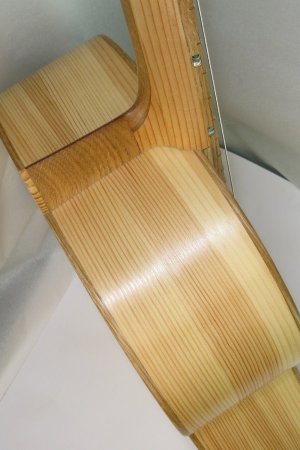
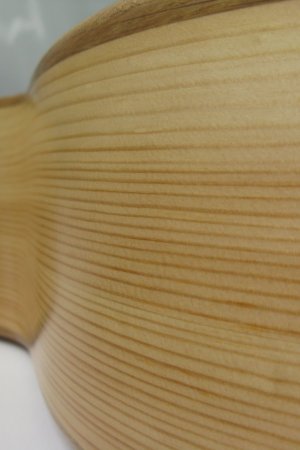
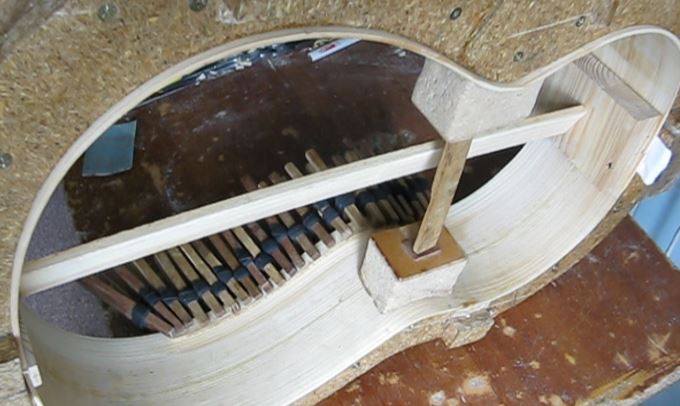
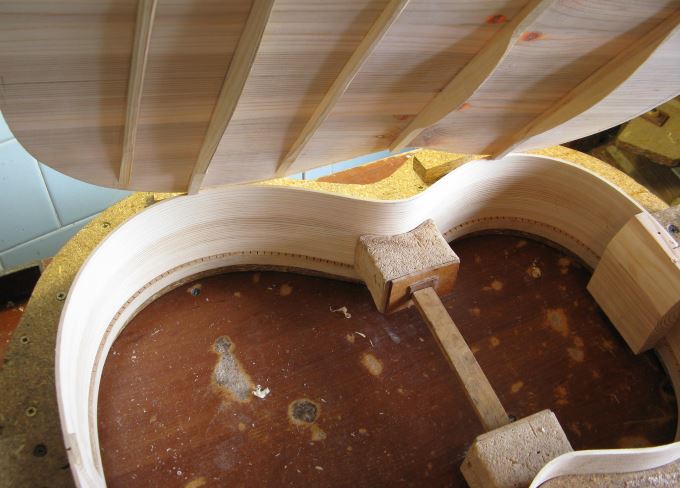
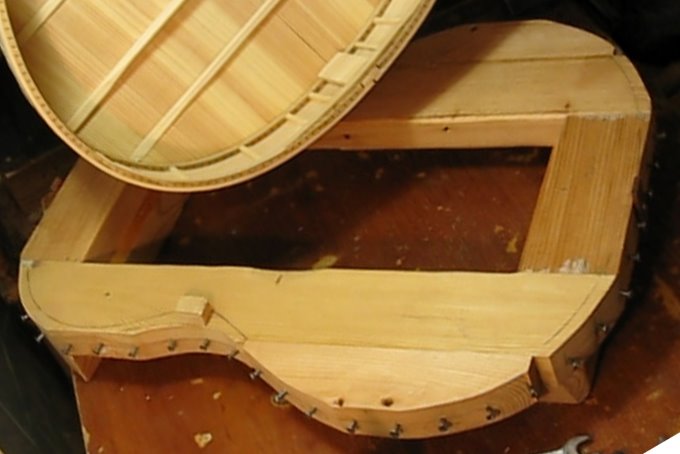
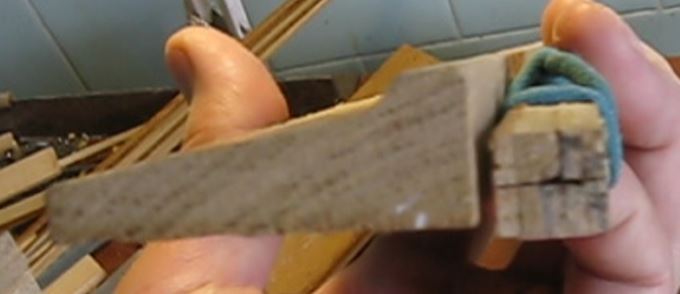
Upper and Lower Blocks
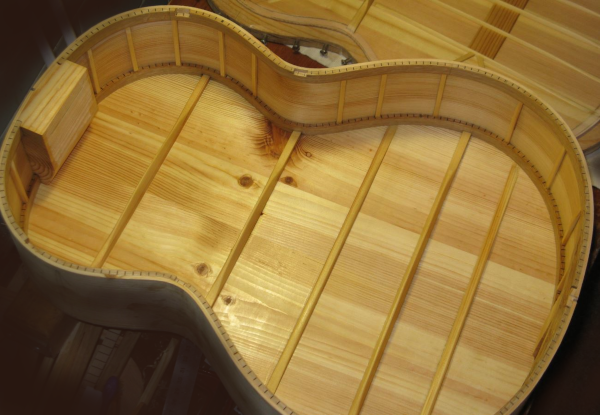
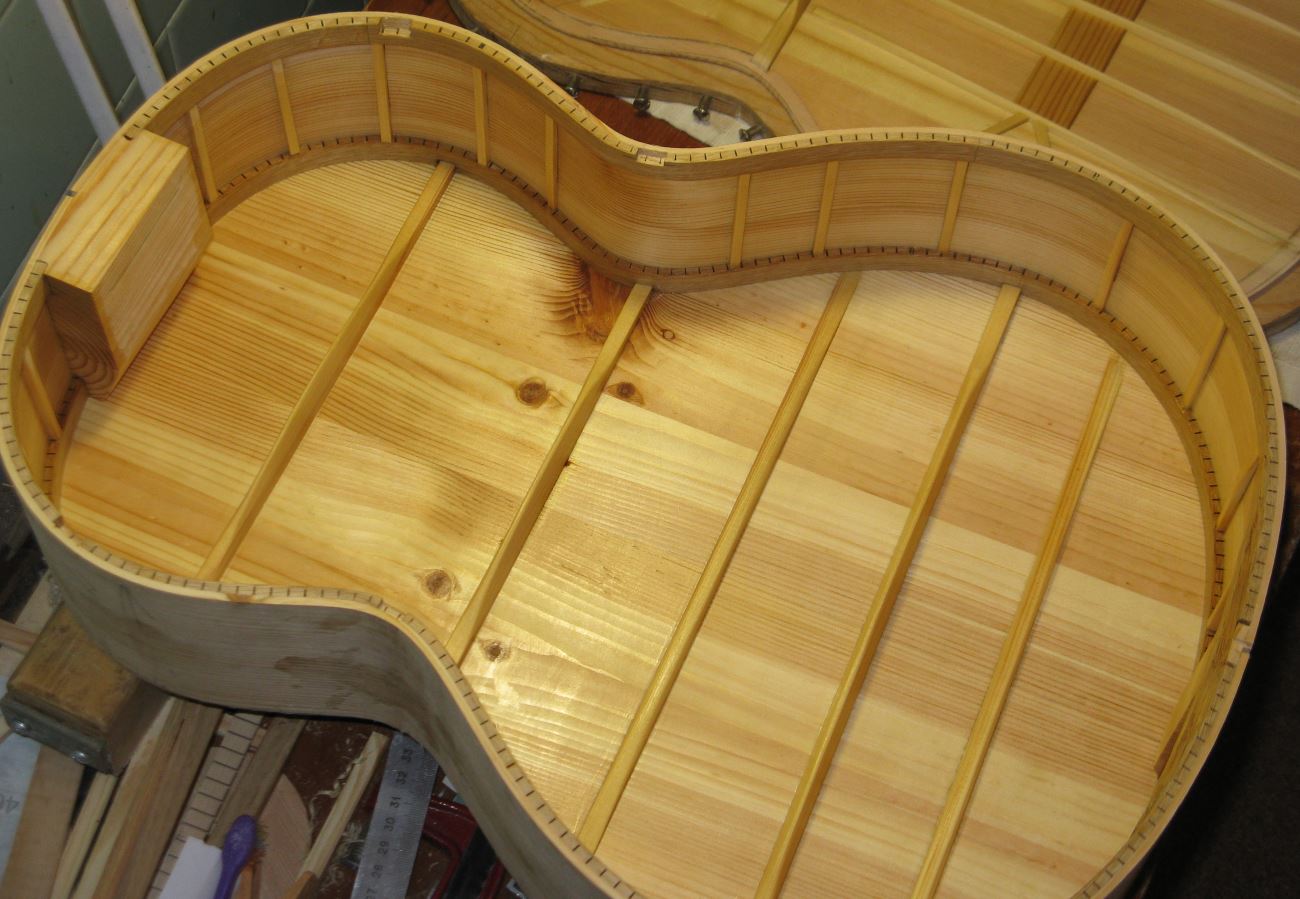
Blocks can also be made from several parts, making them even more reliable. Although a guitar isn't an instrument to be grabbed by the neck and swung around... or does that happen not only in movies... The upper block for me is a good piece of pine. As for the lower block, it's a smart system that can be examined in more detail in the video. I pull the sides to the assembly mould with rubber bands and glue the blocks in their places. The guitar frame is almost ready.
Linings
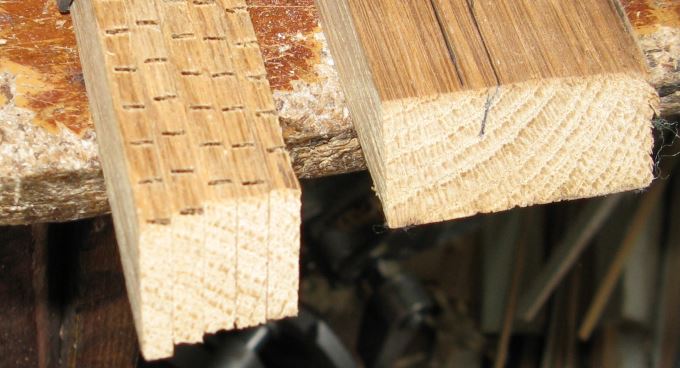
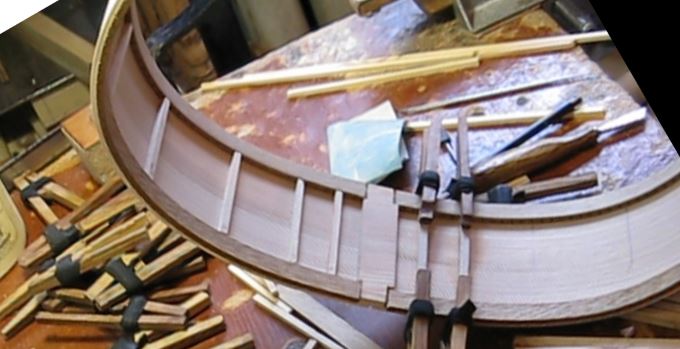
I make the linings from oak. There's nothing technologically complicated in this work. Of course, you can create different types of linings, including separate pieces and solid ones. It's your choice. My lining will have kerfs and will be reverse-glued. The dimensions are 14x4.5 mm.
Don't make the kerfs too small in width so that the wood has room to bend. If you don't have a special machine, a simple way to make kerfed linings is to create planks of equal thickness and cut the kerfs with a depth guide. If the thickness of the blank is the same, the guide located on the side of the saw. Literally, you can stick a plank to the saw using double-sided tape. This device can be made in any workshop.
If it's challenging to make the blanks super consistent in thickness, an alternative could be to create a support on the table. I'm writing and creating this right now. I often improvise.
The issue with kerfed lining is that the remaining uncut part should be consistent in thickness, both individually and altogether. Otherwise, it will bend poorly. If the cut itself isn't even or perpendicular, it might bend at an angle.
Here's an idea I haven't tried but thought of just now: you could attach soft sticks made of the same pine onto the saw's teeth. At the beginning and end of the saw teeth edge. Embed them into the teeth and glue them with super glue. Make everything even. Now the central part of the saw will cut until the attached sticks hit something. Next, on a flat board, the lining blank shifts between four supports, and you can cut between them. The saw cuts until it hits the board by guides. Imagine the lining blank shifting as if it were in a shallow groove on the table, and the saw cutting until the glued teeth hit the table. Consequently, each kerf won't be cut to the same thickness.
Gluing the Linings
Before gluing the linings, it's necessary to level the top edge of the sides. This is almost a flat surface. I place a flat board on top and trim off the excess. If the soundboard will have a dome, then in a lower bout, I need to carve out, but I do this already with the lining before glueing the top.
I glue the linings in sections and cut them in under the blocks. I press them using specially made clamps, which I've crafted myself. They are very strong, by the way. They are made of oak too.
Now it's necessary to trim the height of the sides to the intended level. Don't forget about the thicknesses of the soundboard and back. Refer to your guitar blueprint.
It's convenient to prepare the edge of the sides against the finished back before gluing the linings so that you won't need to cut the height of them later. The back should easily rest on the edge with a gentle touch of your fingers. A great technique is to use a large dish with sandpaper inside. Some people trim the sides before bending. I really dislike that approach. I don't even want to think about it.
Now, onto the prepared edge-to-back of the sides, I glue the kerfed linings. I bend the slightly dampened kerfed linings on a hot iron and let them dry directly on the guitar. After a couple of hours, I proceed with gluing.
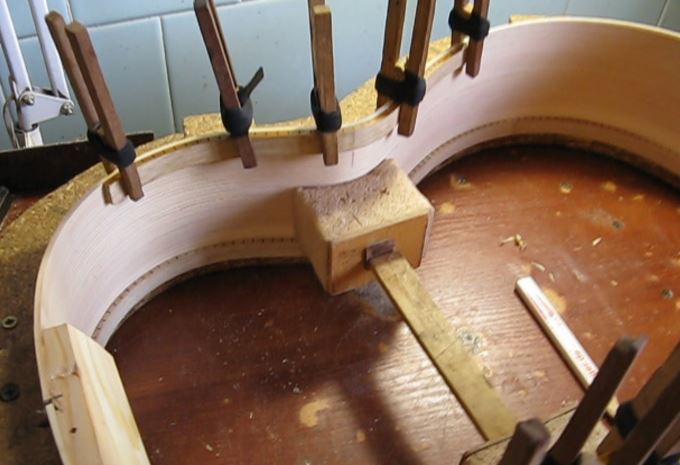
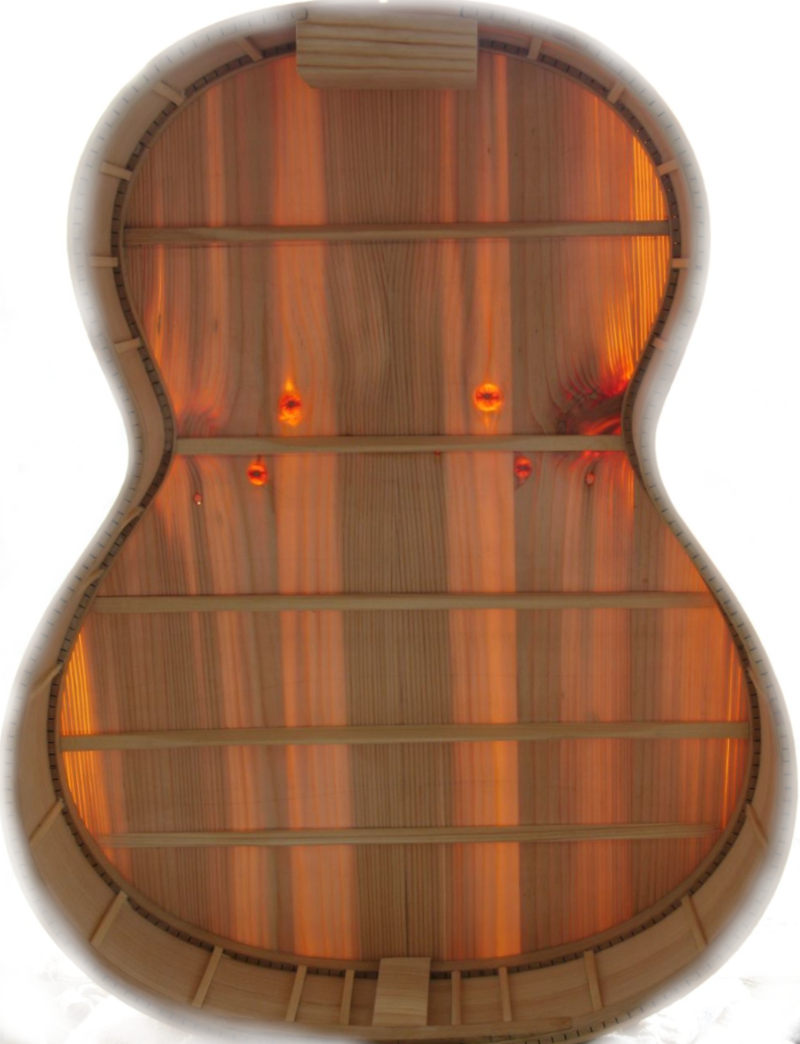
I decided to reinforce the pine with crosswise pine braces on the sides, pressing them against the linings.
For gluing the back, I made a special tool from the same pine. It allows for the precise placement of the guitar frame and securing the back with rubber bands. It also has a opening to wipe off excess glue immediately after pressing.
I had to slightly tilt the central line of the back to get rid of an annoying nail hole that somehow managed to be precisely in the back thickness and was noticed a bit late. Nevertheless, it had to be removed.
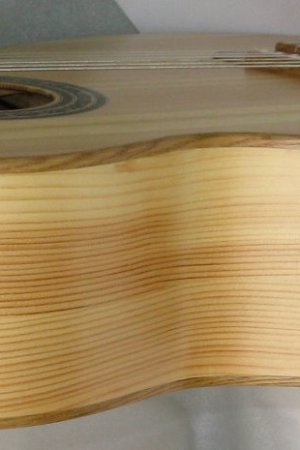
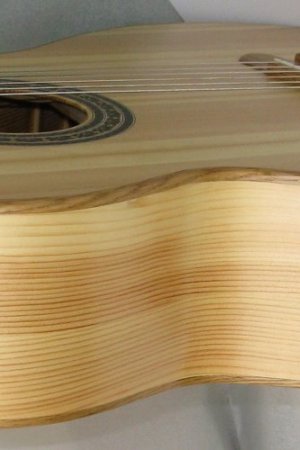
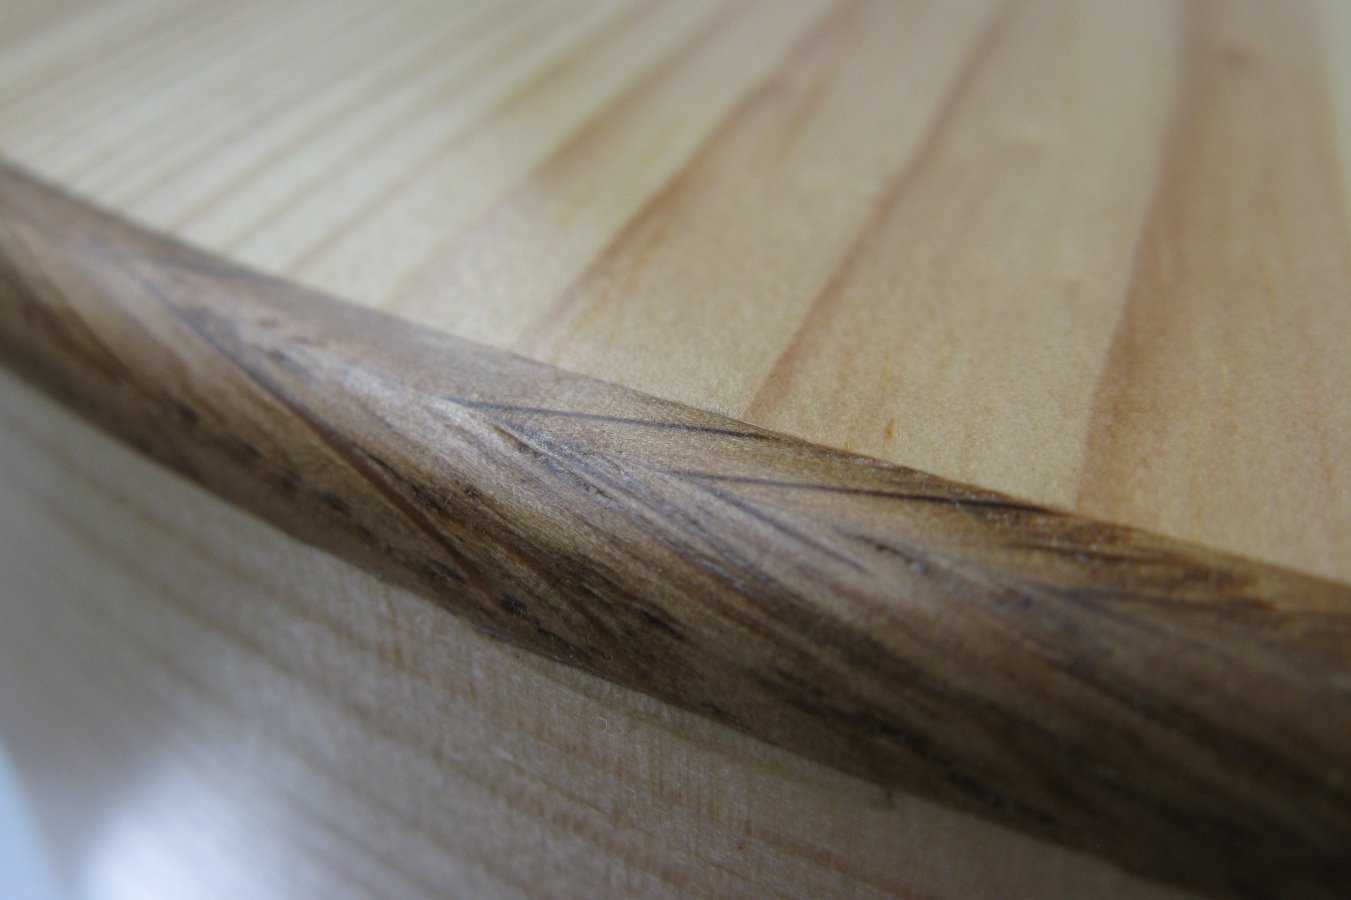
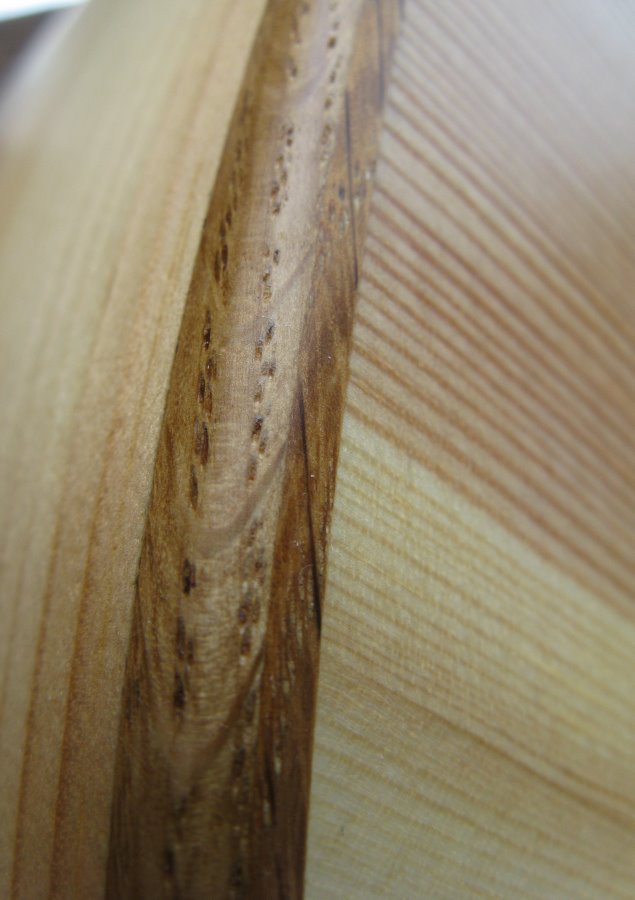
The photo against the light shows the pine filled with resin, creating an interesting translucent effect
Now it's time for a final check and fitting of the soundboard to the sides. I cover the inside of the guitar with shellac
The soundboard is conveniently pressed using rubber bands, as you've already seen. It's better to press it around the blocks with clamps.
Preparing body
Trim the excess from the soundboard and back that protrudes over the sides. Don't leave them too large before gluing. I remove these residues with a chisel and plane.
Next, I work on the surface of the sides, which involves leveling it with scrapers and sanders.
Then, I bring the thickness of the soundboard and back to the required size along the edges. Before edge binding, this thickness is clearly visible, and you can work with sharp scrapers and sanders. Remember that the soundboard bends under the tool, so work very carefully. It's better to reach the intended thickness of the soundboard before the binding, as it decreases in height afterward. However, within 0.5 mm, it's a minor issue and can be taken into account. Plus, the binding holds the tool better. When working with the router, you can accidentally scratch the soundboard. In general, develop your own habits during the processes.
Binding
I suggest using a simple binding made of two parts. It's very unpleasant to bend a 4 mm thick solid piece of wood around the waist curve. There's a high chance of it breaking. Therefore, I create two strips, each 2 mm thick, which bend easily, and then I glue them together. I prefer the binding height to be around 5.5 mm. Pay close attention to the seam between the binding and the sides to avoid later filling it with wood filler.


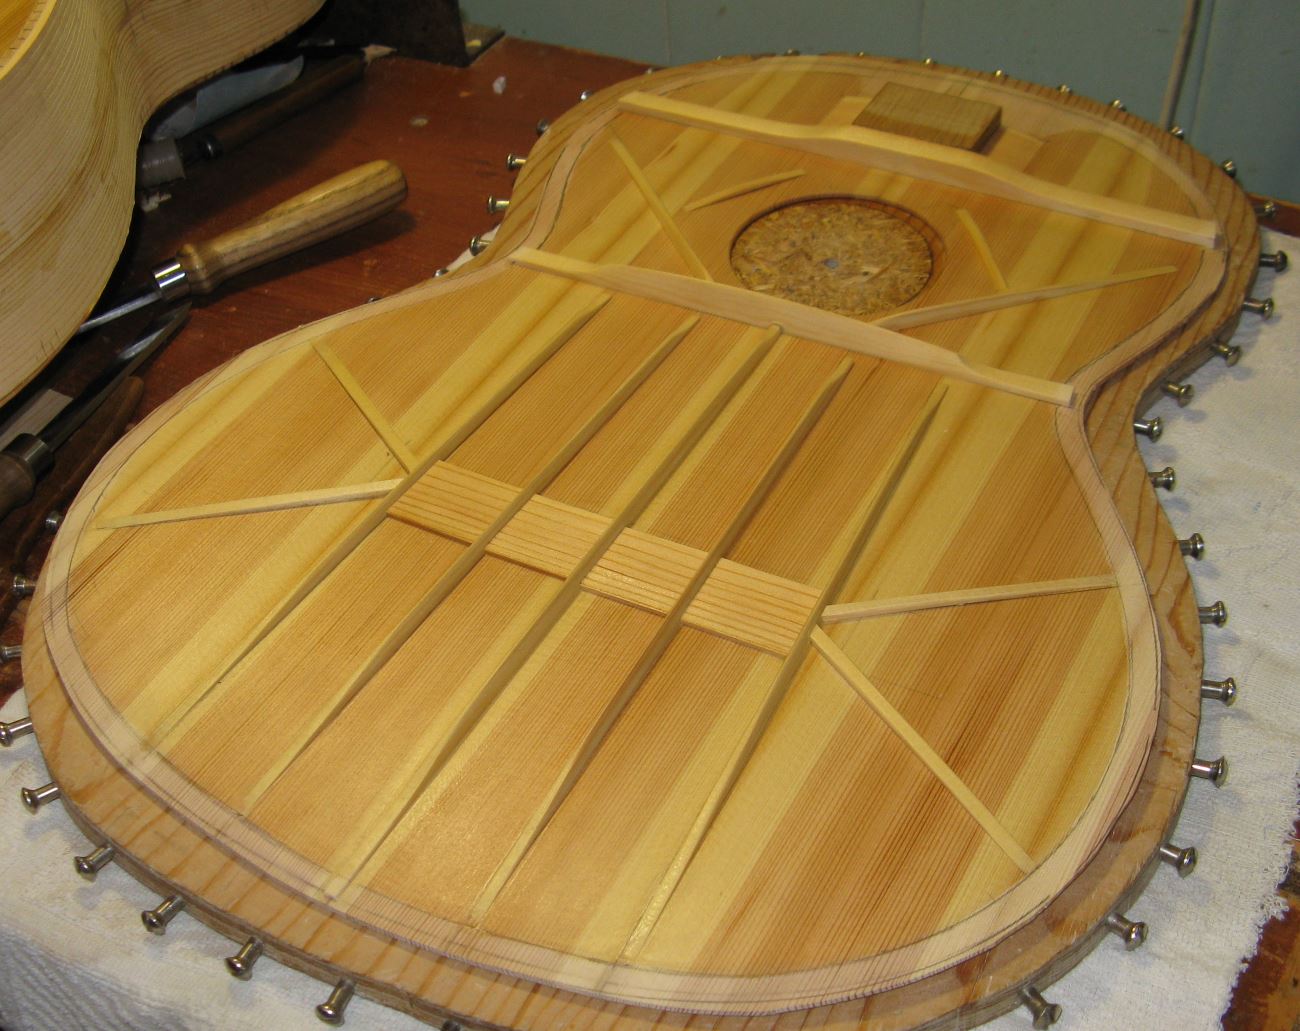
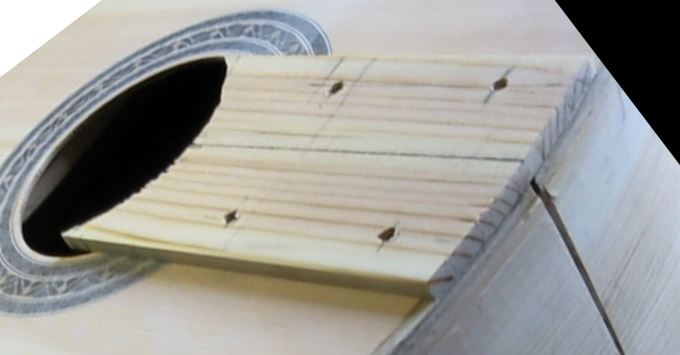
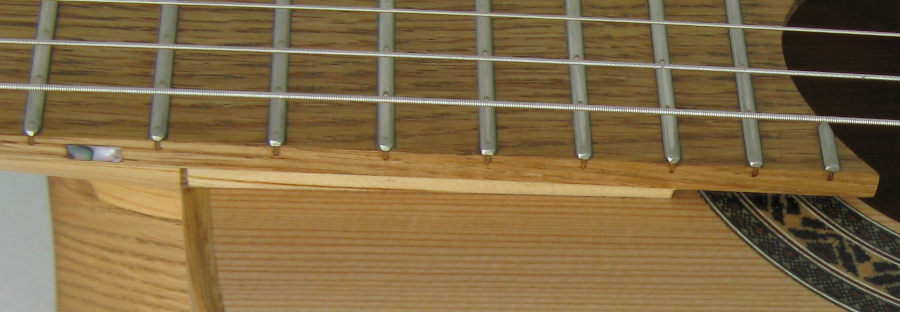
The insert between the fingerboard and the soundboard.
Raising the fingerboard above the soundboard slightly simplifies adjusting the neck angle, fretwork, and is comfortable for the player. Some believe that altering the string approach angle to the soundboard also affects the guitar's sound.
For now, I'm only determining the height of this insert at the edge of the guitar, which is about 5+ mm for me. I'll bevel it towards the soundhole later referring to the surface of the neck. The insert has extra material at its sides and is temporarily screwed in place with small screws.
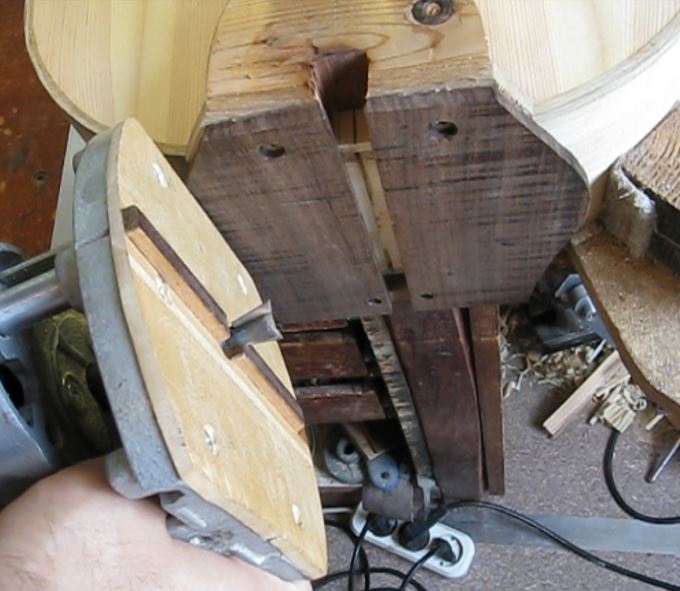
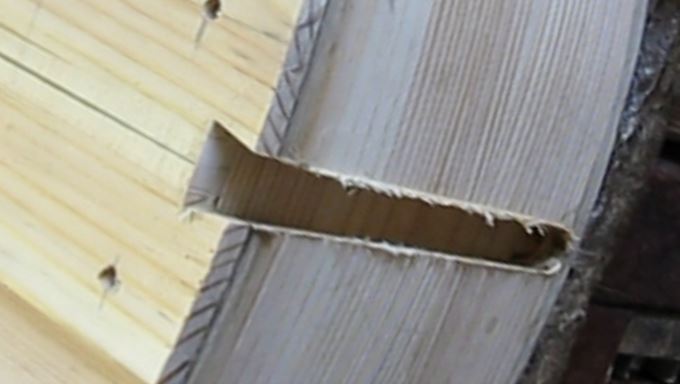
I have specially made guides for making the dovetail joint groove. Everything is visible in the photo. Please, check maybe I had said more in the video, there is English subtitles there.
Everything's ready with the guitar body to start installing the neck. In the next article, I will demonstrate how to cut the neck blanks without betraying the glorious ideals of the 'Completely Pine Guitar.'
Video version with English subtitles.