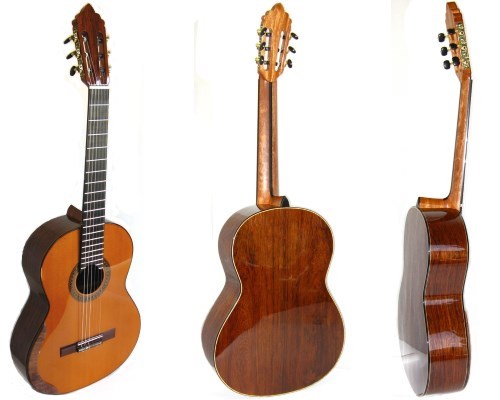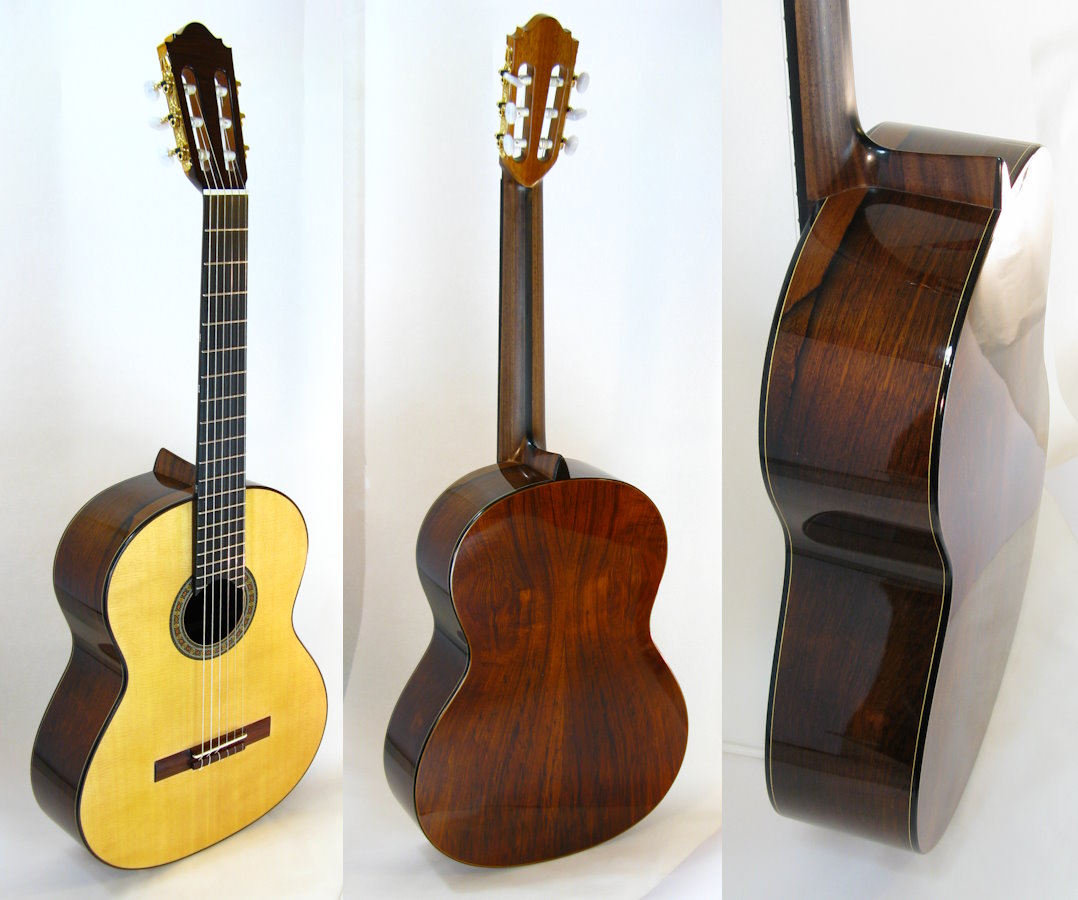
On your guitar, there are two holes for securing each string on the bridge. Awesome! But how do you tie the string through two holes? There are several ways, but some of them may result in the string slipping out and hitting the body painfully. I've researched this issue and will show you how to properly tie the string through two holes in the bridge.
Certainly, you tie the strings on your guitar with twelve holes in the bridge and are aware of the issue of the first thin strings slipping out of the fastening. String slippage can occur even on a bridge with 6 holes. (There is an article about it, please tap on the tag "Strings" where you can find one.)
In fact, this slippage mostly concerns the first and second strings, but sometimes even the third. Bass strings usually don't slip because they have another structure. However, with the first string, it happens very often. Thin carbon strings are especially prone to this. They are very thin and soft, perfect for slipping out of the loop. These are precisely the most expensive professional strings. Oh, these rich things always think only about themselves! But we'll tie them with a dead knot :)
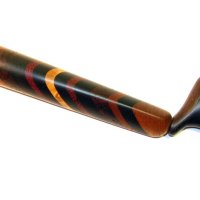
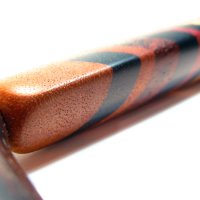
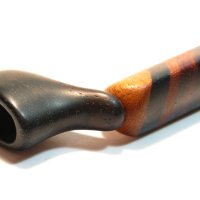
Often, the string slips right during the stringing process. The string hasn't fully tensioned, and the loop is too loose. The string slips and hits the body very hard just behind the bridge. This mishap can occur with the regular tying method through a single hole as well. The photo shows just such a case. Such an awful dent!

Why does such a strong impact occur? The whip effect comes into play. The string slips out of the loop, unwinding, and the tip hits the body. If the lacquer layer is not too thick, the body gets a dent because it's made of soft wood like spruce or cedar.
Additionally, to protect the area right behind the bridge, you can attach a transparent, self-adhesive film. A narrow strip, about 12 mm wide, just behind the central part of the bridge. The protective film not only guards against slipped strings but also shields the body from scratches left by string ends during tying. After all, the holes are very close to the top.
Here's how Mykola Roodenko (it's me:) recommends tying the strings through two holes to avoid slipping and hitting the body:
- Make knots at the tips of the first strings. The first carbon string is quite tricky and sly. A single knot tightened at its tip may be so small that it can slip out of the loop. I suggest using two knots. For the second string, you can skip one knot if desired. The third string usually only needs one knot or a burnt matchstick tip.
- The string should be threaded through the holes in a specific way to prevent it from hitting the body when it slips. I will demonstrate this method with illustrations.
Let's go through, step by step, how to tie each string on the guitar in practice. The order of attaching the strings matters because, on the headstock, the strings can interfere with each other slightly. While not critical, it's more convenient if the sequence goes from the edge to the middle, in other words, 6 5 4 and 1 2 3. I tie them in pairs: 1 and 6, then 2 and 5, and finally 3 and 4.
So how to tie:
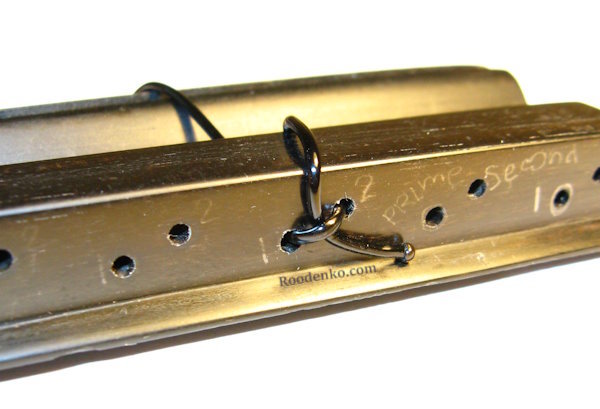
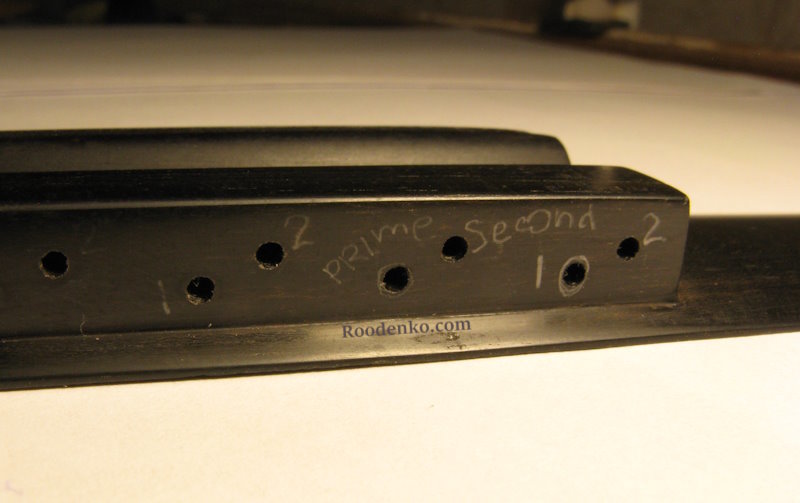
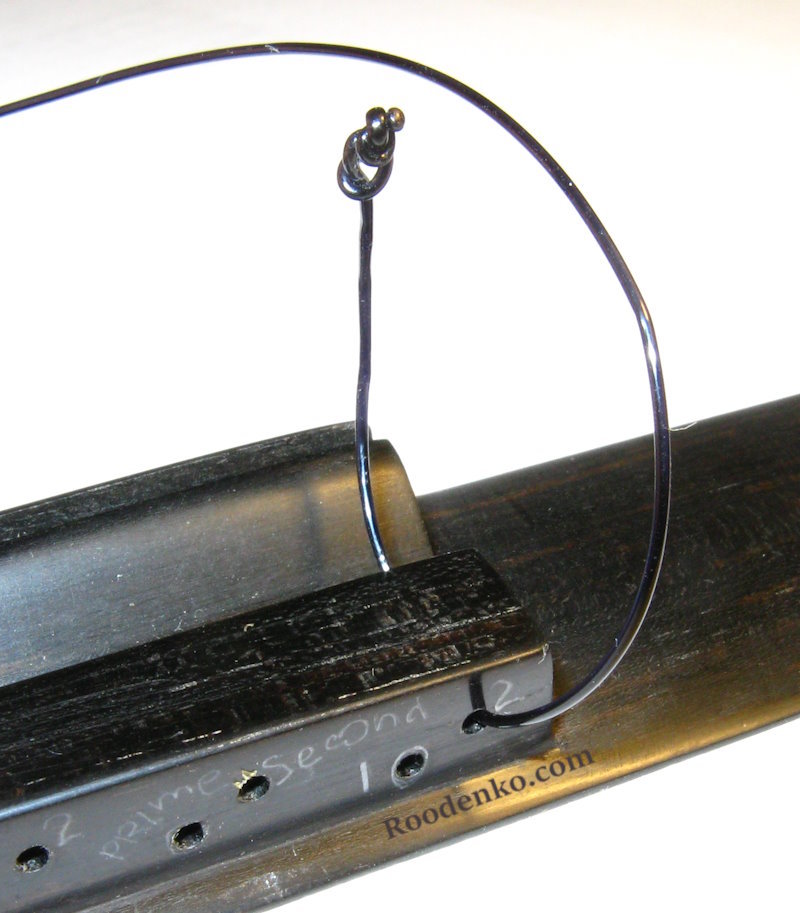
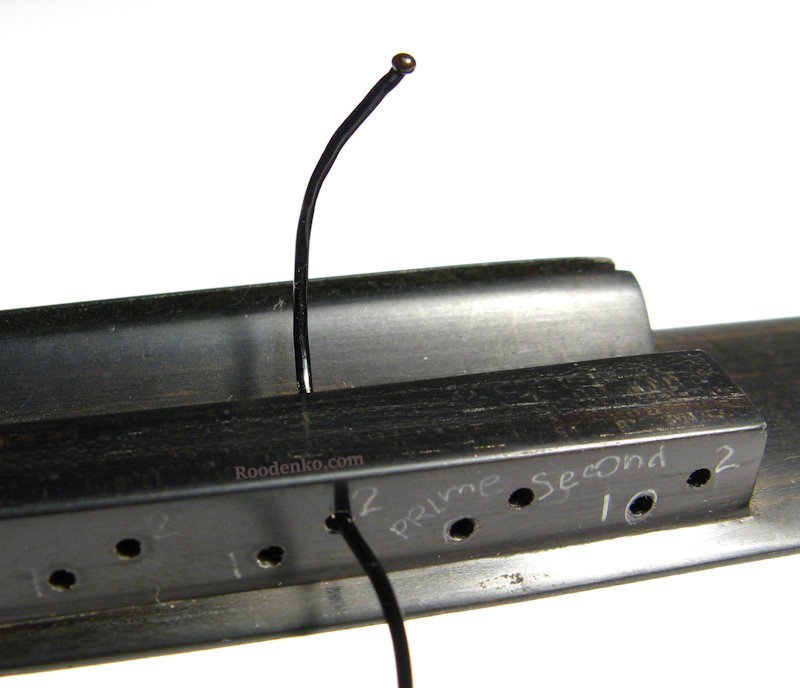
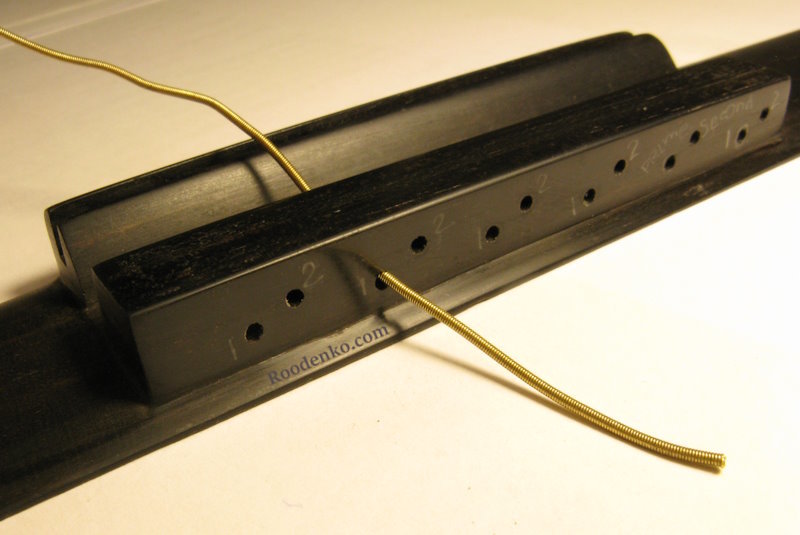
I have labeled the holes. For the second string, I used words; for the others, I used only numbers. In other words, on the left is the main hole, and slightly higher on the right is the auxiliary hole.
How to tie the first nylon or carbon string on the guitar.
No more suspense; let's start with the most challenging, the first string. To keep it simple and avoid anything unnecessary over the guitar top, we'll tie all knots away from the guitar.
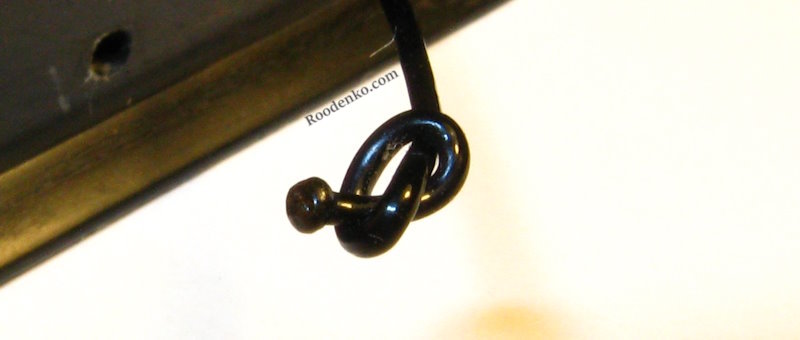
Start by making the first knot at the very end of the string. Tighten this knot, and lately, I've been singeing the end of the string with a lighter – a bit of showing off, to be honest. Trim the excess; I use nail clippers.
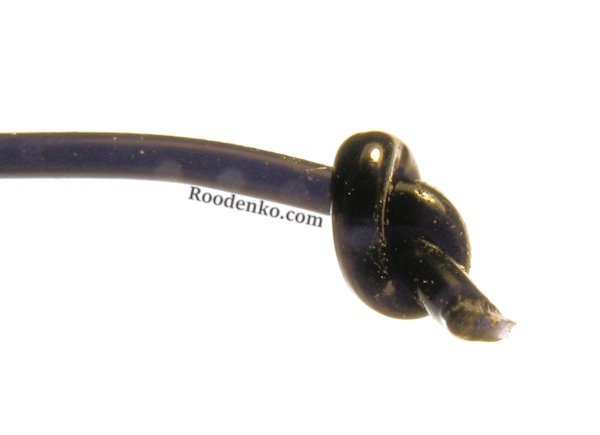
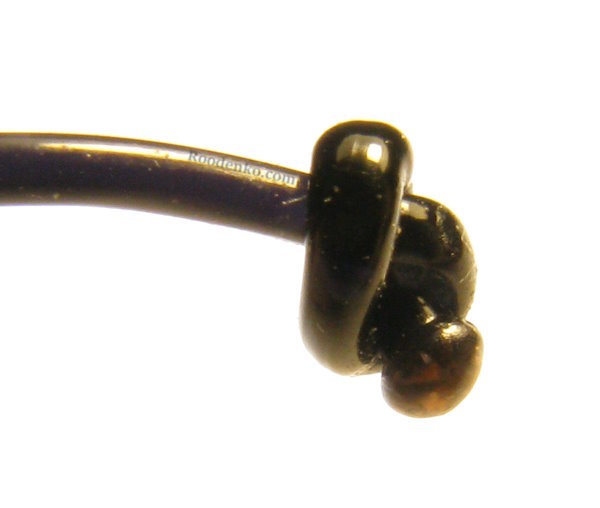
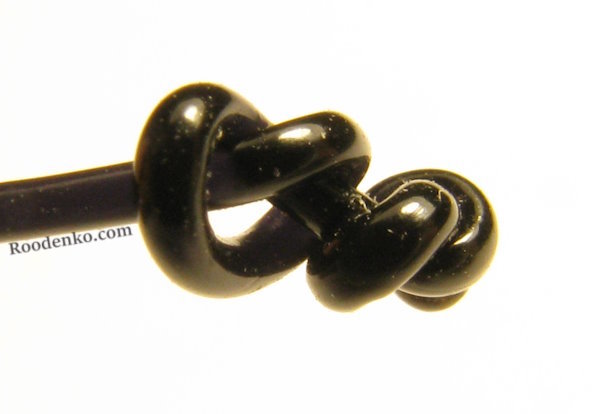
Tie the second knot immediately next to the first one, but don't tighten it. Leave some space to thread the string through it, creating a loop. Don't worry if it seems like a tangle of knots. For the first and even second strings, these knots are quite small.

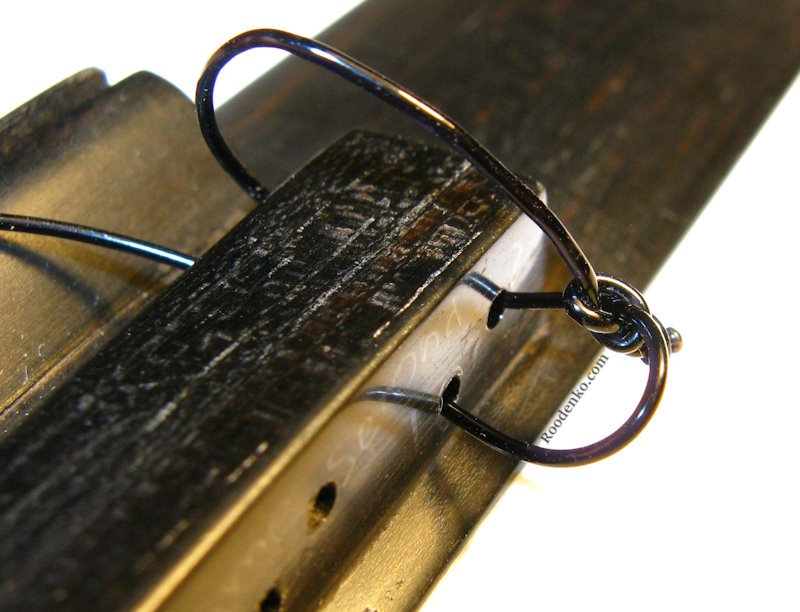
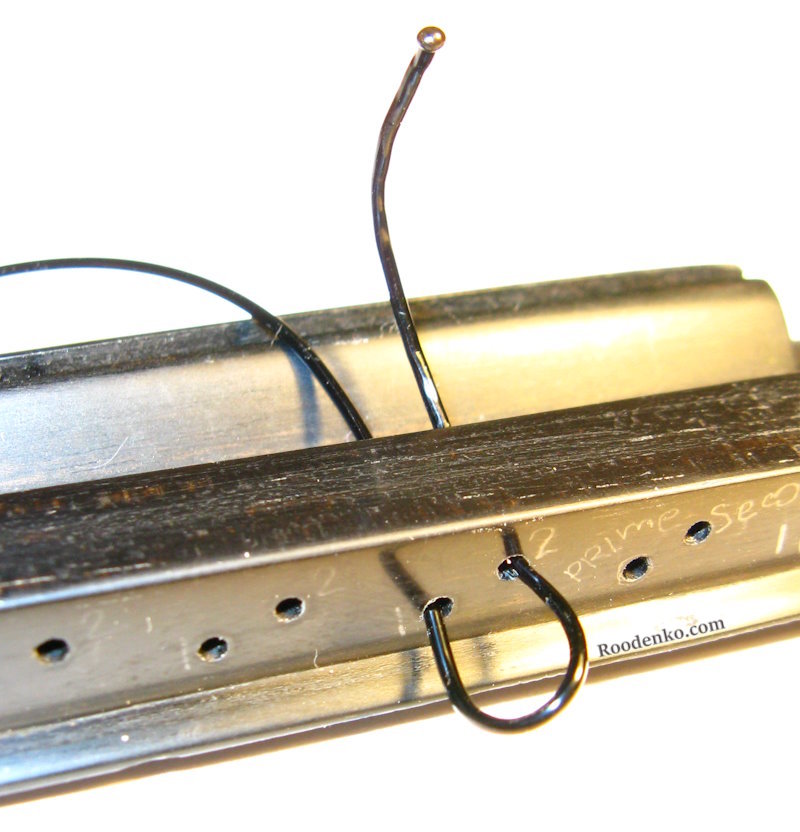
Approach the guitar. Thread the string from the soundhole side into the auxiliary hole. Pull it through to the middle.
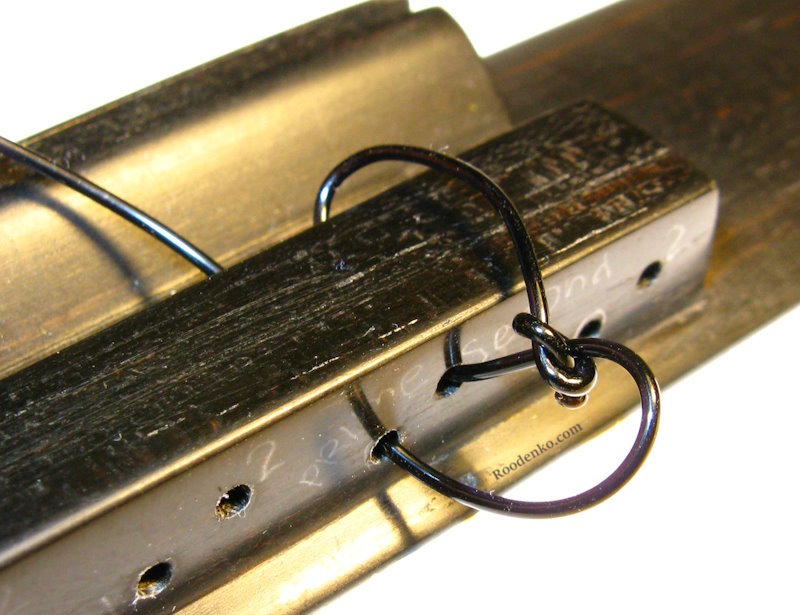
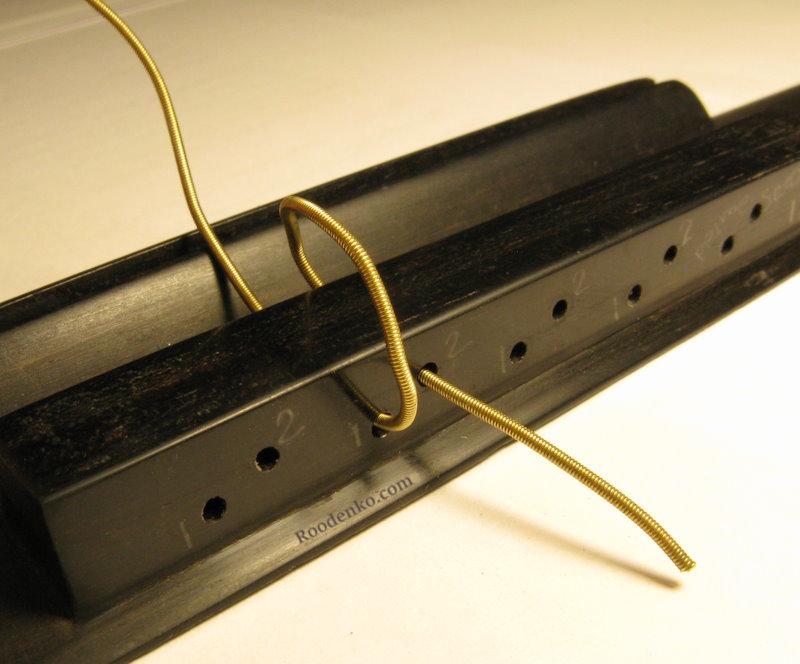
Thread the string through the prepared second knot and pull this loop towards the bridge.
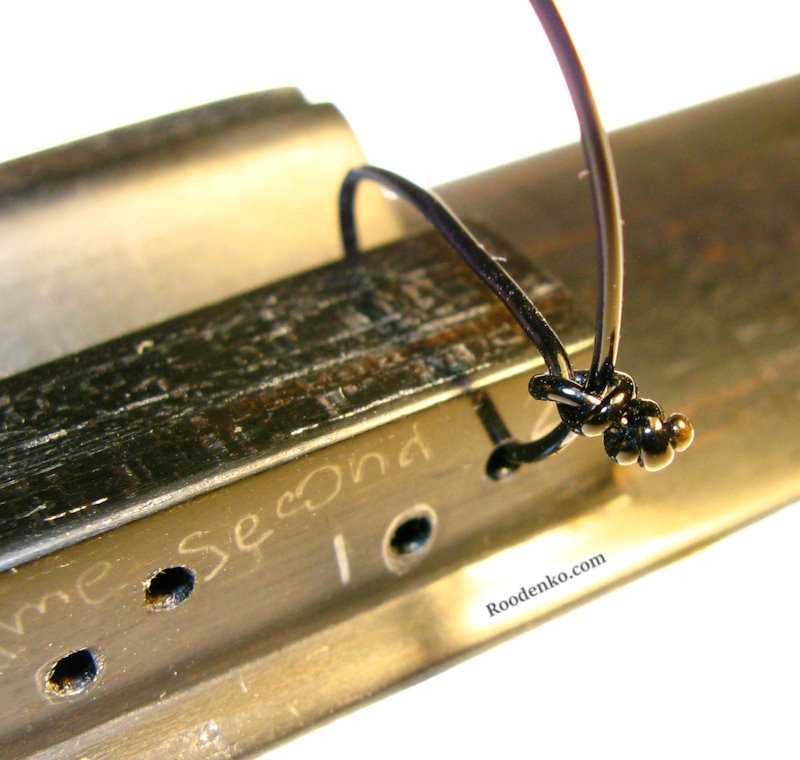
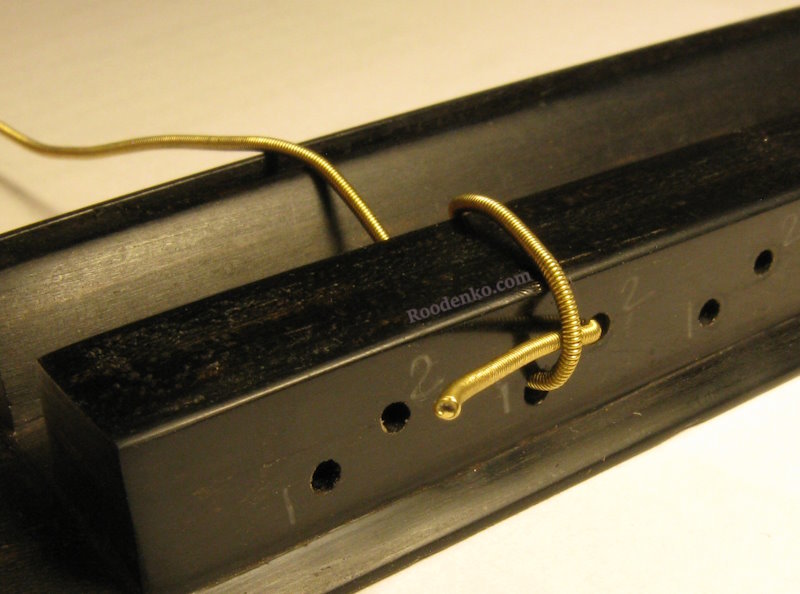
Now, thread the free end of the string through the main hole.
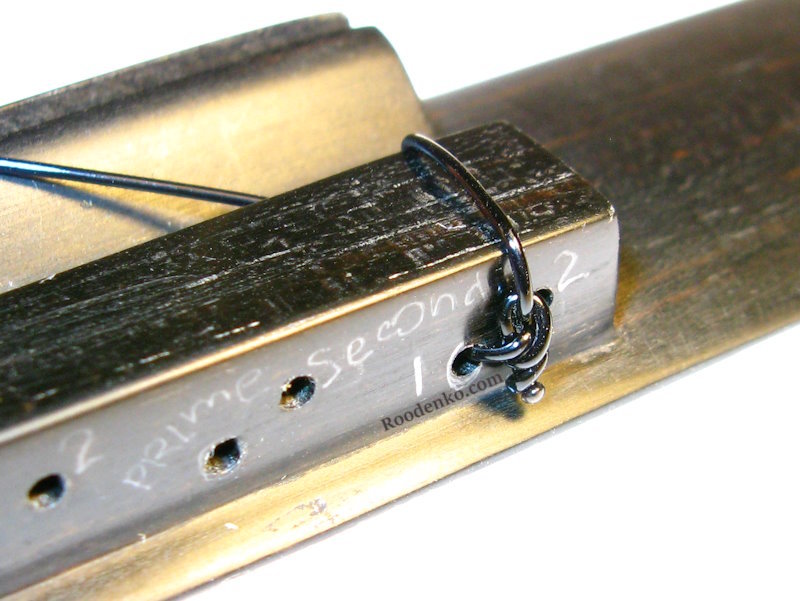
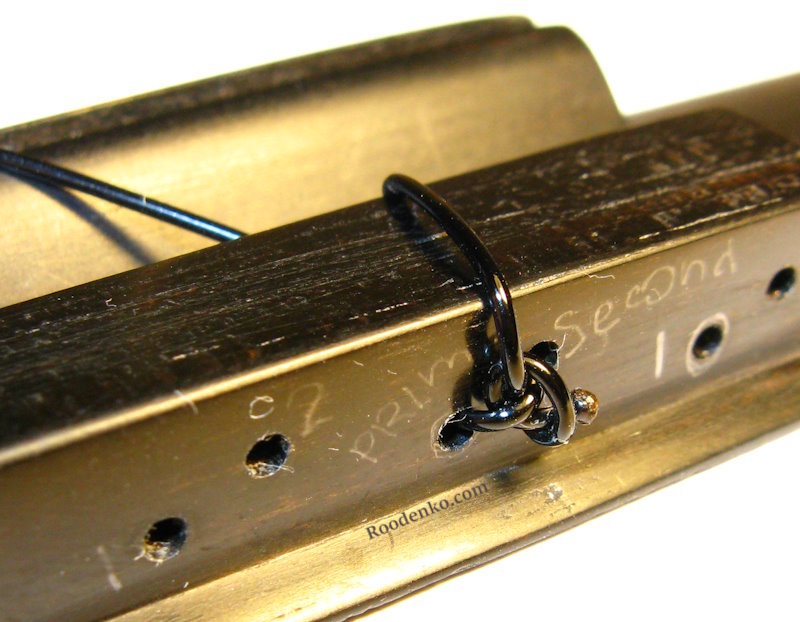
Tighten. That's it! Brilliant and simple. Nothing will slip out ever, neither immediately nor later. Yes, you can skip making the first knot. Not making any knots is risky. However, if your string slips without knots, it won't hit the body. The key is to thread it in the sequence I described. On the third string, there will be no extra knots, and it's easy to see how the string is inserted.
How to tie the second string.
I tie it the same way as the first. I consistently use carbon string sets, and the second string is also very thin. If you have slightly thicker nylon strings, you can skip the second knot and tie it like the third string in the next paragraph. However, I prefer to make the second knot. Even though in my photos, I have somewhat stiff nylon strings. Instead of the first knot, making a small ball with a lighter is sufficient.

How to tie the third string.
Even for thin carbon strings, the third string is already thick enough. One tightened first knot is definitely sufficient. However, you can also do it like with the second string in the photo above, with just the second knot. This ensures that when you turn away, the tail won't pop out of the loop.
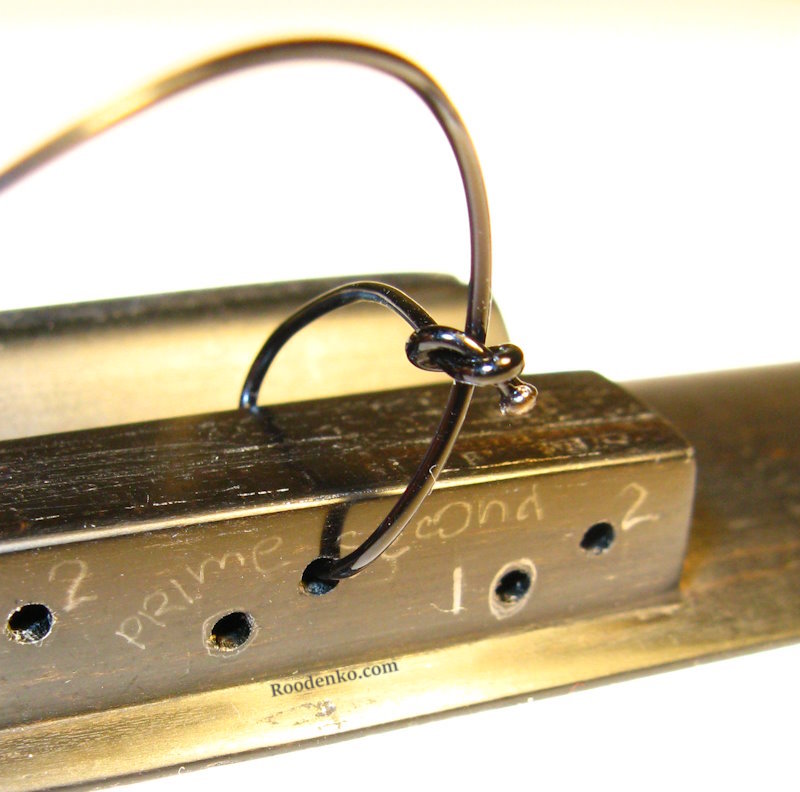
Alternatively, you can just singe the end if the string is very thick. Thread the string through the auxiliary hole from the rosette side. Pull it through almost the entire length.
Insert the string into the main hole and pull it through. Similarly, pass the end with the knot through the loop that forms.

For some stiff nylon strings, you might not need to make knots on the third or even the second string. Just leave the tail a bit longer, and when the string is tensioned, trim it. Now, let's move on to the bass strings.
How to tie the sixth, fifth, and fourth nylon strings on the guitar.
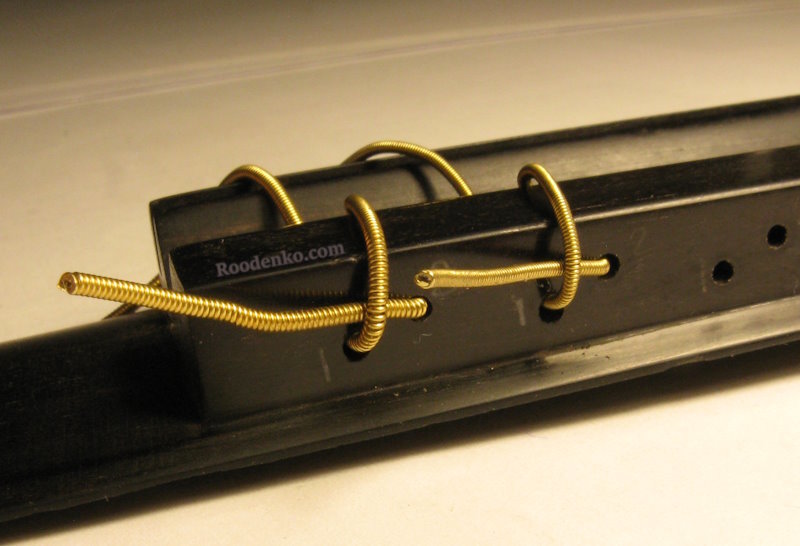
As I mentioned, there's no need for anything extra here. Some strings have a bit of looseness in the winding at the end. I use it on the bridge, not on the tuning pegs. It's crucial to have a full winding on the lower saddle. Thread the string into the main hole from the rosette side.
Pull the string slightly and thread it again from the rosette side into the auxiliary hole.
Thread the end of the string through the loop that forms. Tighten it. Leave a bit more, and then trim the excess of the string with pliers.
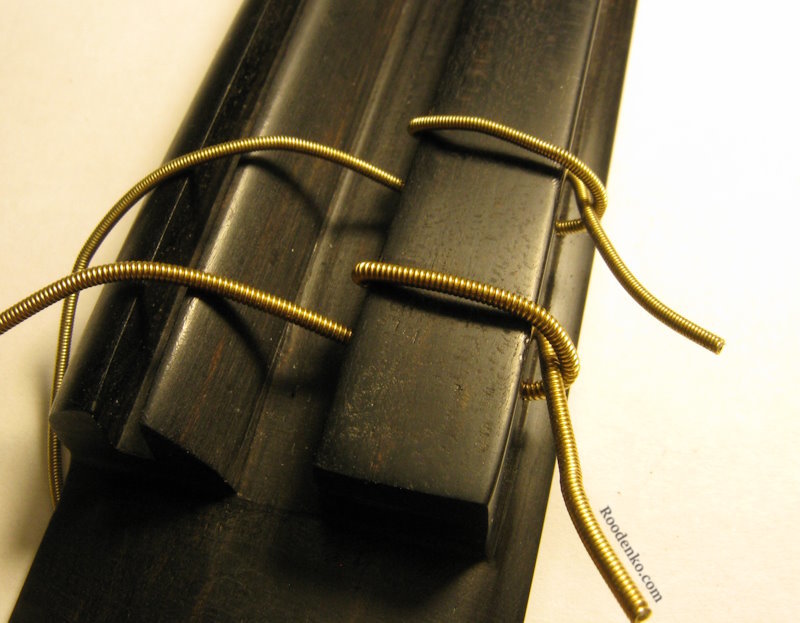
Strings with a winding don't hit the body, so their threading sequence is different from what's needed for plain nylon or carbon strings. However, the method described is commonly encountered for the first strings.
Another issue is self-unwinding. A guitarist may do everything right on the bridge, move on to winding the string on the tuning pegs, and not notice how the loops on the bridge have unraveled. (It's crucial to maintain tension at all times.) The method described above solves this problem. Strings won't pop out of those loops even if they loosen.
In summary, we've explored ways to tie strings on a guitar with two holes in the bridge, addressing issues such as string slippage and hitting the body. The two auxiliary knots almost guarantee that the string won't slip, and even if it does (I honestly don't know how), it won't hit the body because we've correctly threaded the string from the beginning.
Wishing you success with your strings!